1.3 [새 프로젝트 만들기] 대화상자 중간의 목록에서 “Windows Forms 앱(.NET Framework)”을 선택한다.
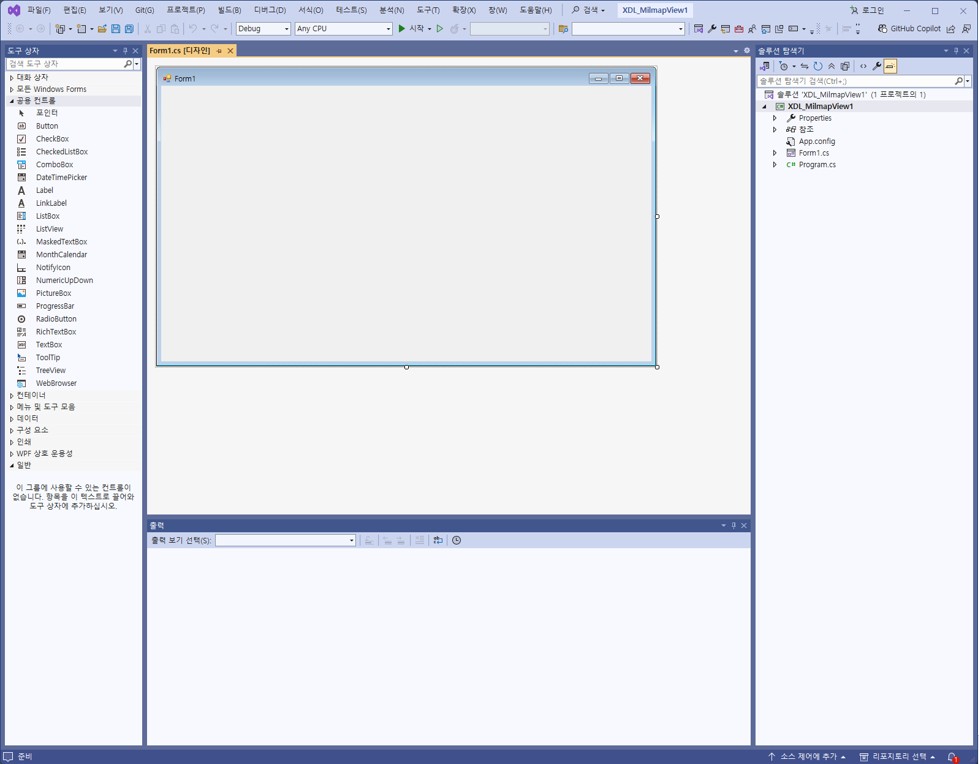
“다음” 버튼을 눌러 프로젝트의 이름(XDL_MilmapView1)을 입력하고 [새 프로젝트] 대화상자의 “만들기” 버튼을 클릭한다. “만들기” 버튼을 누르면 프로젝트가 기본적으로 생성되고, 화면에 Form을 디자인할 수 있는 화면이 생성된다. 만약 아래와 같이 Form 디자인 화면이 생성되지
않으면, [솔루션 탐색기] 창에서 “Form1.cs”를 마우스 더블 클릭하여 디자인 화면을 연다.
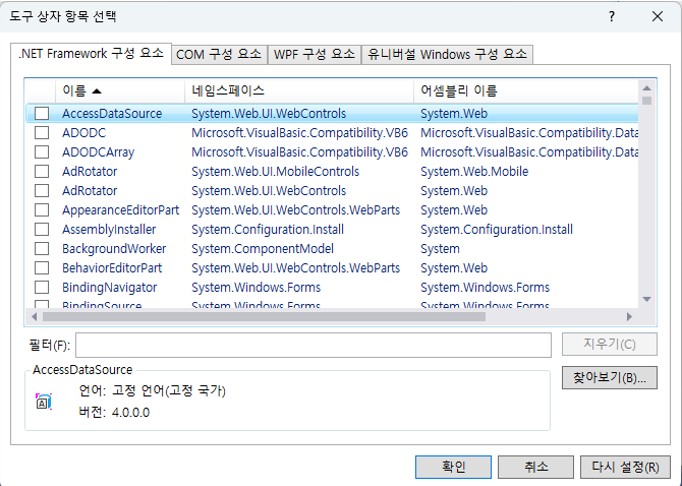
1.4 [도구상자]의 [항목선택]을 선택한다.
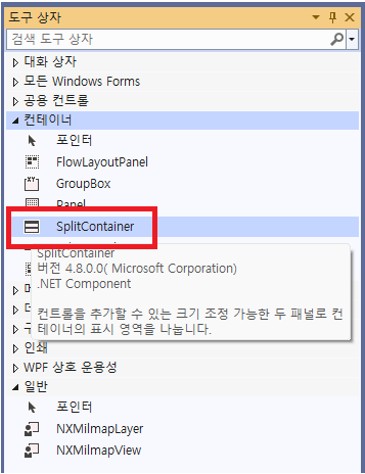
[도구 상자] 창의 “일반”에서 마우스 오른쪽 버튼을 클릭하여 생성되는 팝업메뉴에서 “항목 선택” 메뉴를 선택한다. 메뉴를 선택하면 아래와 같이 [도구 상자 항목 선택] 대화상자가 나타나며, 대화상자 아래쪽에 있는 “찾아보기” 버튼을 클릭한다.
열기 대화상자에서 “C:\Pixoneer\XDL3.0\bin\NXMilmap.dll” 파일을 선택한 후 “열기”를 클릭하고, [도구 상자 항목 선택] 대화상자의 “확인” 버튼을 클릭한다.
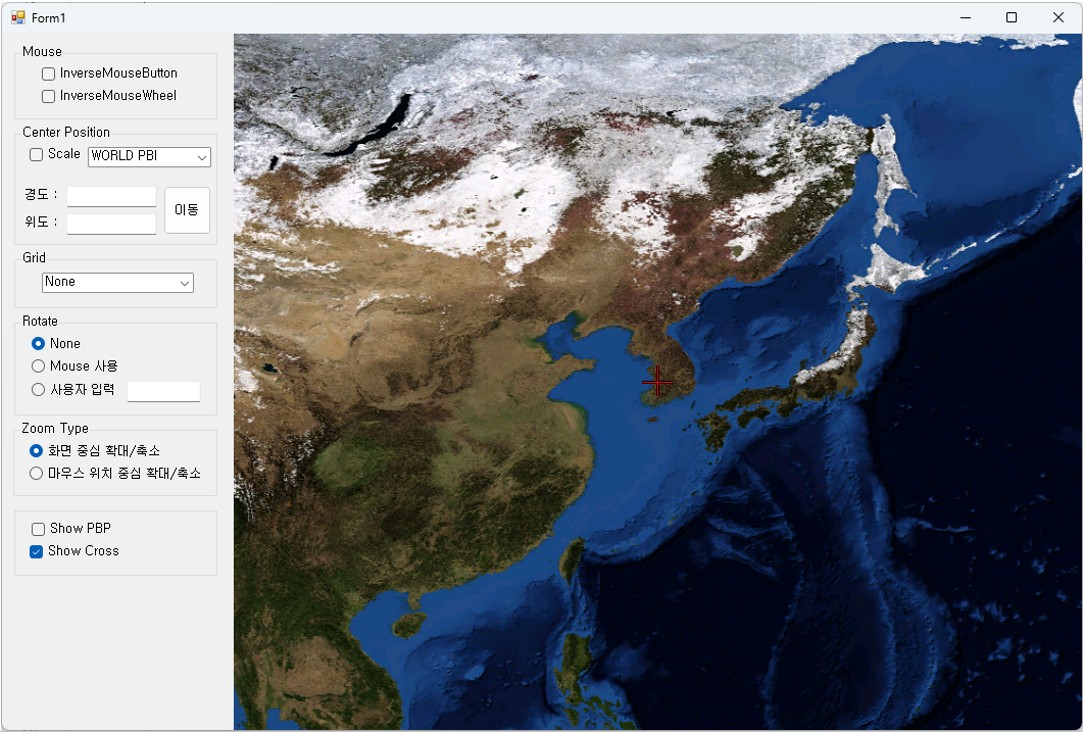
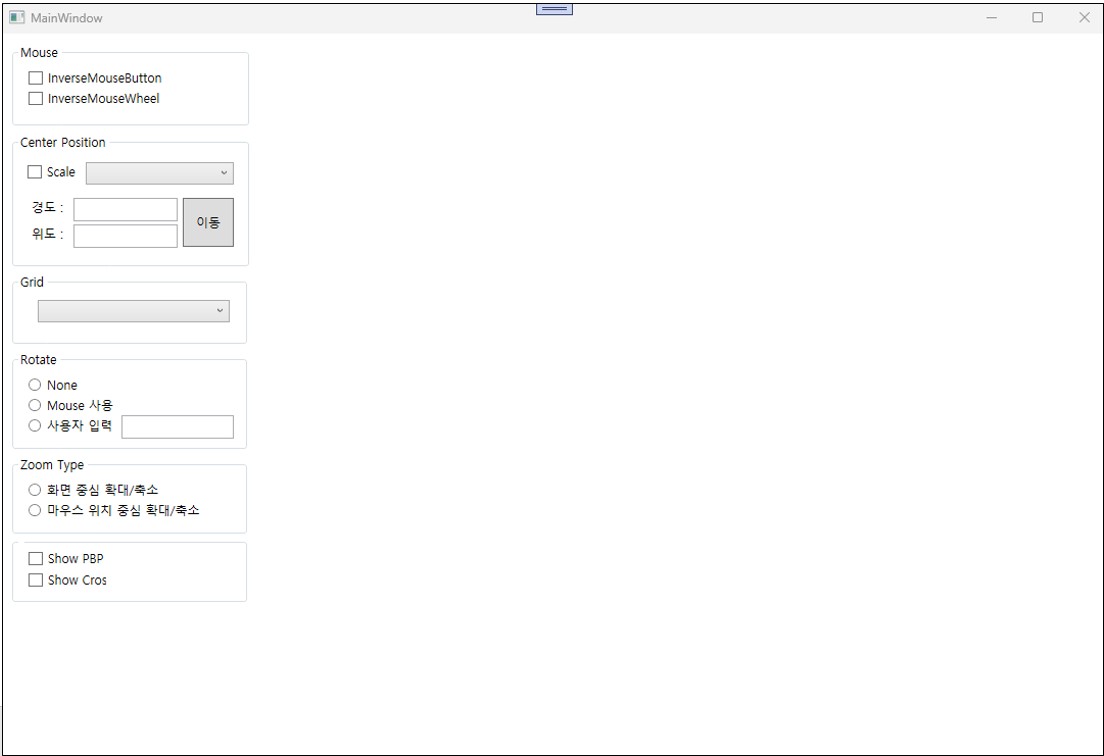
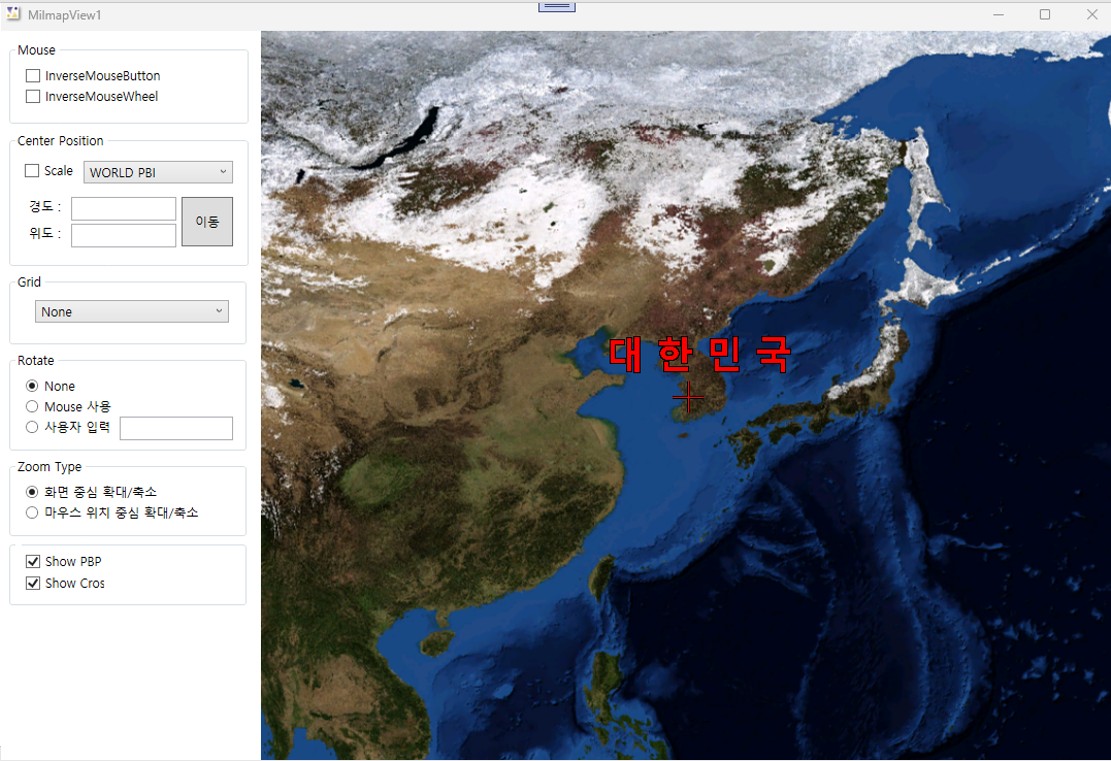
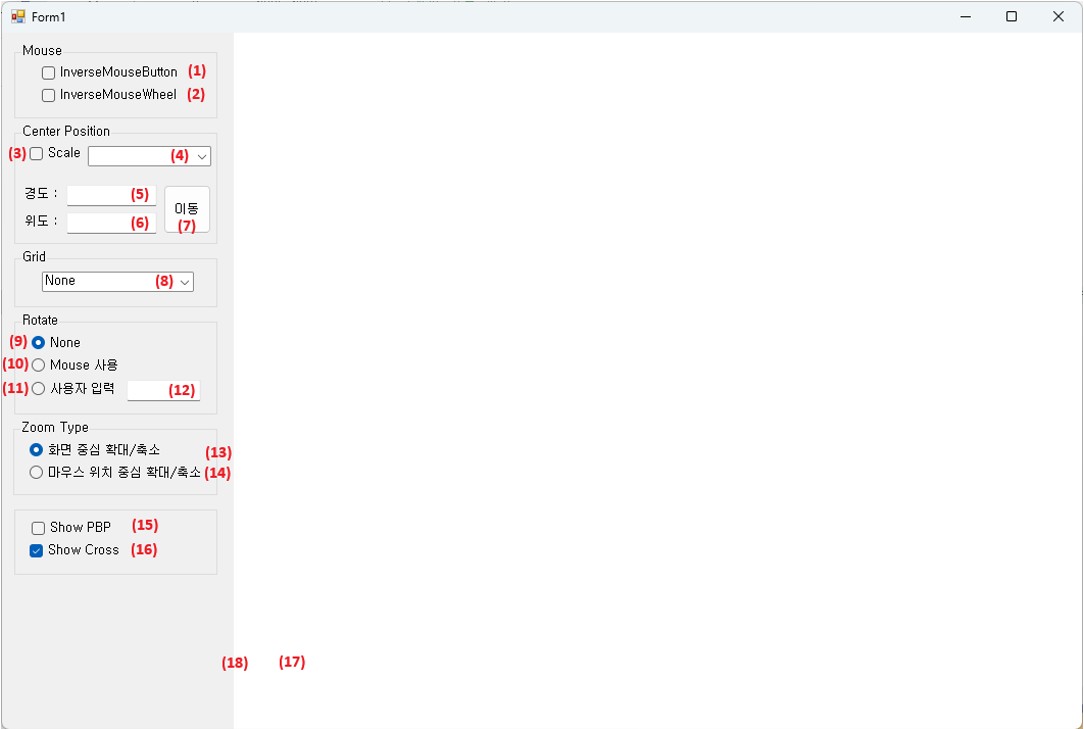
Form1에 splitContainer1이 추가되며 아래와 같이 “Panel1”과 “Panel2”가 생긴다. Panel1에는 (1)~(16)의 컨트롤을 추가하여 디자인하고, Panel2에는 (17) 컨트롤을 추가한다. Panel1의 디자인은 위의 표를 참고로 구성하도록 하며 여기에서는 생략하도록 한다.
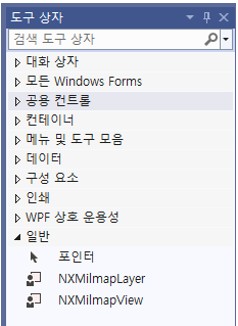
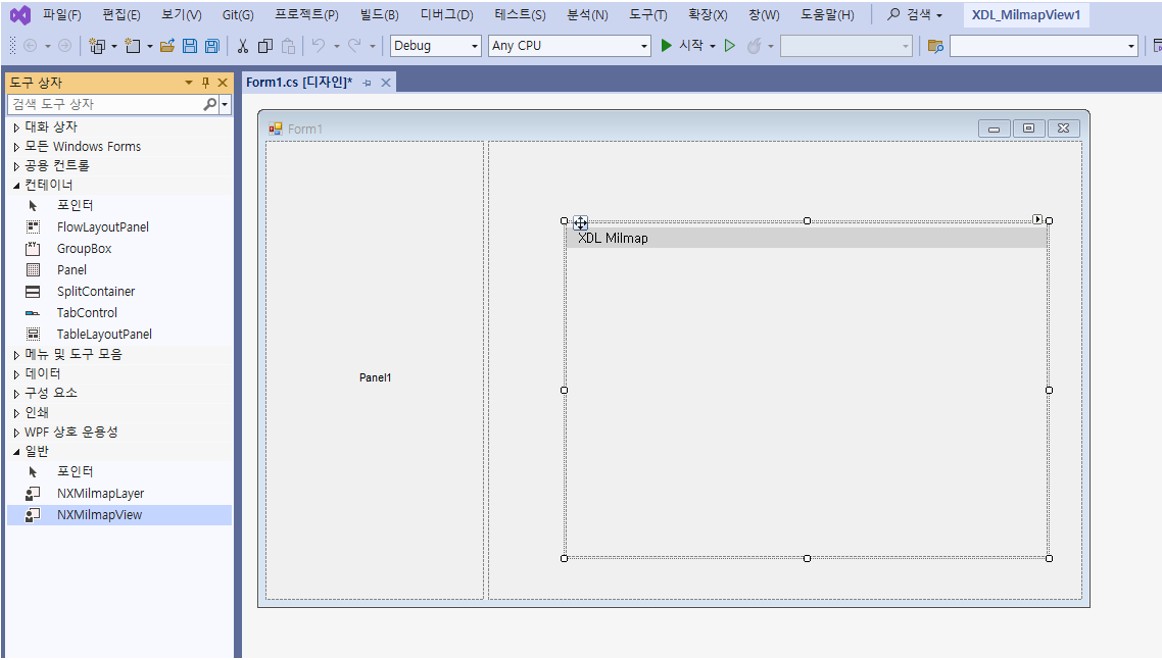
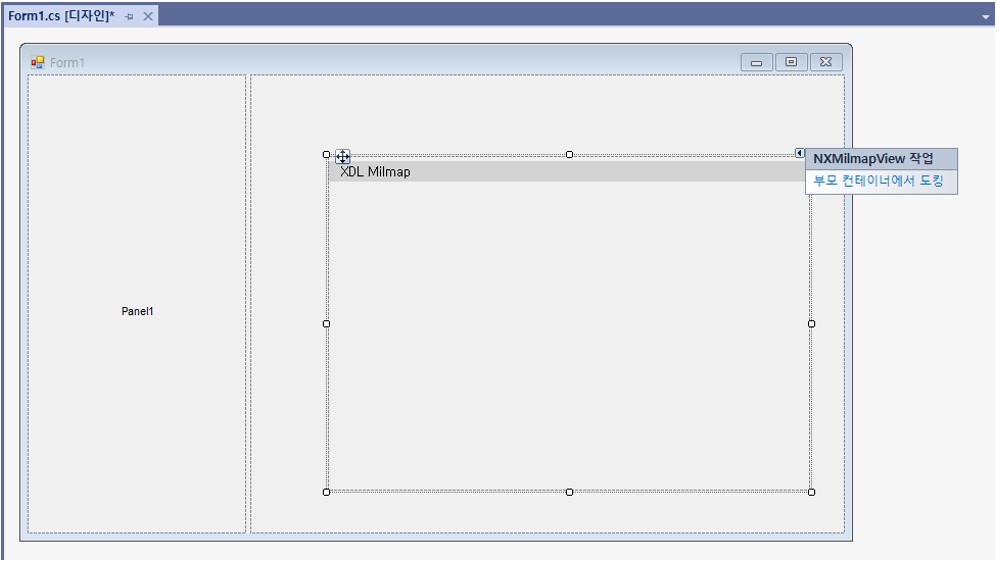
2.2 [도구 상자]의 NXMilmapView를 선택한 뒤 드래그하여 Form1의 Panel2에 놓는다. Form1 위에 NXMilmapView 컨트롤이 생성된다.
2.3 생성된 NXMilmapView 컨트롤의 오른쪽 상단에 “►” 기호를 클릭하면 “부모 컨테이너에서 도킹” 버튼이 생성되는데 이 버튼을 클릭한다.
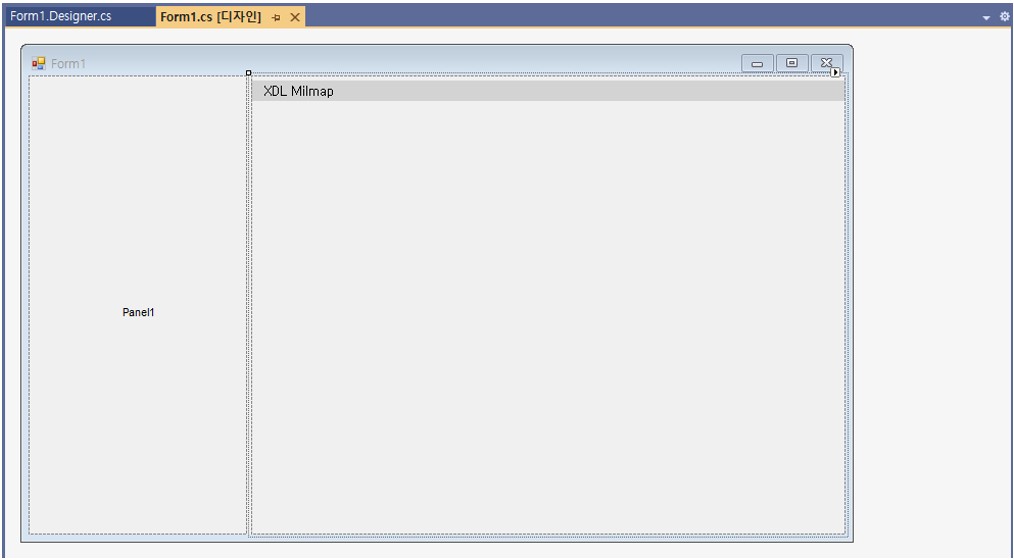
NXMilmapview 컨트롤이 Form1에 도킹되어 전체컨트롤 영역으로 확대된다. Form1.Designer.cs에서 보면 컨트롤 nxMilmapView1 멤버변수가 추가됨을 확인할 수 있다. NXMilmapView는 다양한 NXMilmapLayerXXX들을 담을 수 있는 컨테이너이다. 즉, NXMilmapView는 다양한 계측의 레이어로
구성하여 구 기반 기능을 다양하게 구현할 수 있다.
2.4 NXMilmapView 컨트롤이 Form1에 도킹되어 전체컨트롤 영역으로 확대된다.
3기능 및 이벤트 추가
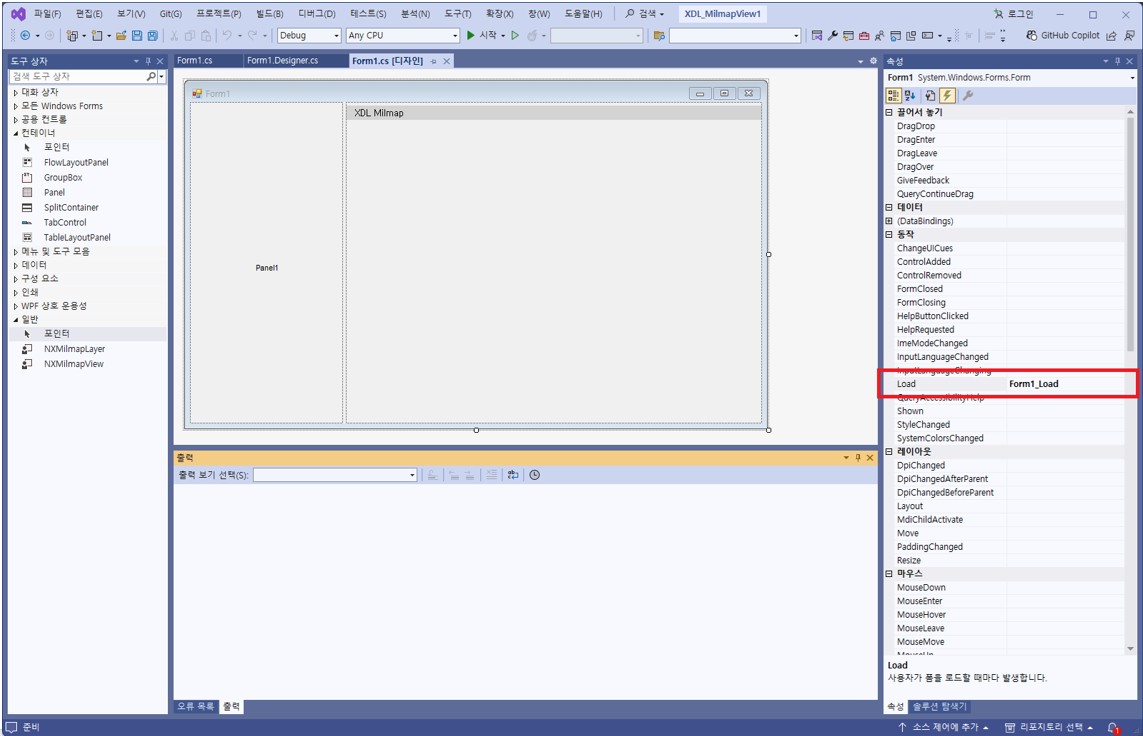
3.1 Form1을 선택하고 [속성] 창 - [이벤트] 메뉴를 선택한 뒤 “Load” 이벤트를 더블 클릭한다.
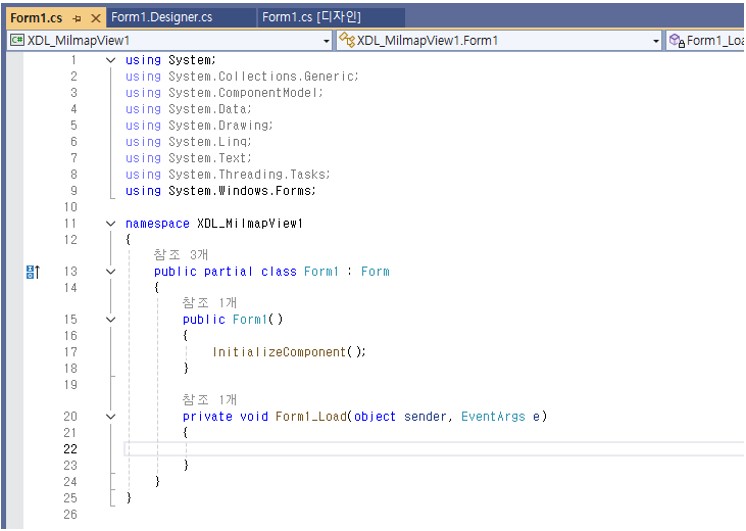
“Load” 이벤트를 더블 클릭하면, “Form1_Load” 함수가 자동적으로 추가되고 아래와 같이 추가적인 기능을 구현할 수 있도록 Form1.cs의 코드로 이동하는 것을 확인할 수 있다.
Form1_Load 함수와 함께 아래와 같이 코드를 추가한다.
C#
private void Form1_Load(object sender, EventArgs e)
{
    // XMilmapConfig.xml을 이용하여 군사지도를 위한 NXMilmapView 및 NXMilmapEngine을 초기화한다.
    if (!NXMilmapView.m_MapEngine.InitFromXML("c:\\Pixoneer\\Xdl3.0\\Config\\XMilmapConfig.xml"))
    {
        return;
    }

    // 마우스 휠을 끌고 당기는 것을 확대/축소 요인으로 계산하여 화면을 확대/축소한다.
    // 이 때, 계산된 공간 해상도와 가까운 축척(scale)이 있는 경우 자동적으로 해당 축척으로 바뀌면서 도시된다.
    // 마우스 휠을 끌고 당기는 것으로 화면의 축척을 변경하려면, NXMilmapView.eWheelZoomAction.ByScaleIndex으로 설정
    nxMilmapView1.WheelZoomAction = NXMilmapView.eWheelZoomAction.ByZoomFactor;

    nxMilmapView1.SetGeoToCenter(0, new XVertex2d(127.0, 36.0));

    // XMilmapConfig.xml에 설정된 지도 중 유효한 데이터만을 사용한다.
    // XMilmapConfig.xml에서 로딩한 스케일의 이름을 Scale을 위한 ComboBox에 추가한다.
    int numScale = NXMilmapView.m_MapEngine.GetNumOfScale();
    for (int i = 0; i < numScale; i++)
    {
        string scaleName = NXMilmapView.m_MapEngine.GetScaleName(i);
        comboBoxScale.Items.Add(scaleName);
    }
    // 첫 번째 스케일을 기본값으로 하여 도시한다.
    if (numScale > 0)
        comboBoxScale.SelectedIndex = 0;

    // Mouse 이벤트 속성
    checkBoxInverseMouseButton.Checked = nxMilmapView1.InverseMouseButton;
    checkBoxInverseMouseWheel.Checked = nxMilmapView1.InverseMouseWheel;

    // Grid
    if (nxMilmapView1.GridType == NXMilmapView.eGridType.GridNone)
        comboBoxGrid.SelectedIndex = 0;
    else if (nxMilmapView1.GridType == NXMilmapView.eGridType.GridDegrees)
        comboBoxGrid.SelectedIndex = 1;
    else if (nxMilmapView1.GridType == NXMilmapView.eGridType.GridGARS)
        comboBoxGrid.SelectedIndex = 2;
    else
        comboBoxGrid.SelectedIndex = 0;

    // MilmapView 회전 설정
    NXMilmapDrawArgs drawArgs = nxMilmapView1.GetDrawArgs();
    if (drawArgs.Rotatable)
    {
        radioButtonRotateNone.Checked = false;
        radioButtonRotateMouse.Checked = true;
        radioButtonRotateUserInput.Checked = false;
    }
    else
    {
        radioButtonRotateNone.Checked = true;
        radioButtonRotateMouse.Checked = false;
        radioButtonRotateUserInput.Checked = false;
    }


    if (nxMilmapView1.ZoomType == NXMilmapView.eZoomType.MousePostion)
    {
        radioButtonZoomMousePosition.Checked = true;
        radioButtonZoomViewCenter.Checked = false;
    }
    // NXMilmapView.eZoomType.ViewCenter이 경우
    else
    {
        radioButtonZoomMousePosition.Checked = false;
        radioButtonZoomViewCenter.Checked = true;
    }

    // 지명 도시 여부 설정
    checkBoxShowPBP.Checked = nxMilmapView1.ShowPlaceName;
    // NXMilmapView는 기본적으로 화면 중앙에 붉은 십자를 표시힌다.
    checkBoxShowCross.Checked = true;
}
3.2 Form1을 선택하고 [속성] 창 - [이벤트] 메뉴를 선택한 뒤 “FormClosed” 이벤트를 더블 클릭한다.
3.3 Mouse 이벤트 관련한 (1)~(2) 컨트롤을 각각 디자인모드에서 선택한 후 더블 클릭한다.
컨트롤에서 마우스로 더블 클릭하면 대표적인 이벤트에 대해 자동적으로 함수가 추가된다.
아래와 같이 코드를 추가한다.
C#
private void checkBoxInverseMouseButton_CheckedChanged(object sender, EventArgs e)
{
    // MilmapView는 기본적으로 마우스 왼쪽 버튼으로 화면 이동을, 오른쪽 버튼으로 화면 화전을 한다.
    // 마우스 왼쪽 버튼과 오른쪽 버튼에 대한 기능을 전환하려면,
    // NXMilmapView의 InverseMouseButton을 true로 설정하면 된다.
    nxMilmapView1.InverseMouseButton = checkBoxInverseMouseButton.Checked;
}

private void checkBoxInverseMouseWheel_CheckedChanged(object sender, EventArgs e)
{
    // MilmapView의 WheelZoomAction 값이 NXMilmapView.eWheelZoomAction.ByZoomFactor인 경우
    // MilmapView는 기본적으로 마우스 휠을 당기면 화면확대가, 밀면 화면축소가 된다.
    // 이를 전환하려면 MilmapView의 InverseMouseWheel을 true로 설정하면 된다.
    nxMilmapView1.InverseMouseWheel = checkBoxInverseMouseWheel.Checked;
}
3.4 축척을 변경하고 특정 위경도 위치로 화면 중심을 변경하는 것을 구현하기 위해 (4), (7) 컨트롤을 각각 디자인모드에서 선택한 후 더블 클릭한다.
(3) 컨트롤인 checkBoxScale을 선택하고 (4) 컨트롤인 comboBoxScale을 변경하여 선택된 축척으로 화면을 도시하고, (5)~(6)의 TextBox 컨트롤에 위경도를 입력한 뒤 (7) 컨트롤인 buttonCenterMove를 클릭하면 해당 위치로 화면의 중심을 이동하려 한다. 이 때, 입력 위치에 해당 축척이
있는 경우에만 이동가능하다.코드는 아래와 같다.
C#
private void comboBoxScale_SelectedIndexChanged(object sender, EventArgs e)
{
    // 축척(scale)을 선택하지 않은 경우에는 축척 변경을 하지 않는다.
    if (!checkBoxScale.Checked) return;

    int numScale = NXMilmapView.m_MapEngine.GetNumOfScale();
    int idx = comboBoxScale.SelectedIndex;
    // 축척 인덱스의 유효함 체크
    if (idx < 0 || idx >= numScale) return;

    NXMilmapDrawArgs drawArgs = nxMilmapView1.GetDrawArgs();
    // 현재 화면 중심으로 해서 변경된 축척 인덱스로 변경
    nxMilmapView1.SetGeoToCenter(idx, drawArgs.CenterPos);
    // 화면 갱신 요청
    nxMilmapView1.RefreshScreen();
}

private void buttonCenterMove_Click(object sender, EventArgs e)
{
    double posLon = Double.Parse(textBoxCenterLon.Text);
    double posLat = Double.Parse(textBoxCenterLat.Text);
    // 입력 화면 중심 위경도 좌표 유효 체크
    if (posLon < -180.0 || posLon > 180.0) return;
    if (posLat < -90.0 || posLat > 90.0) return;

    NXMilmapDrawArgs drawArgs = nxMilmapView1.GetDrawArgs();
    // 현재 설정된 축척을 기반으로 화면 중심을 이동한다.
    nxMilmapView1.SetGeoToCenter(drawArgs.ScaleIndex, new XVertex2d(posLon, posLat));
    // 화면 갱신 요청
    nxMilmapView1.RefreshScreen();
}
3.5 (8)~(16) 컨트롤을 각각 디자인모드에서 선택한 후 더블 클릭한다.
(8) 컨트롤인 comboBoxGrid를 이용하여 Grid의 도시 여부 설정 및 종류를 설정하고, (9)~(12) 컨트롤을 이용하여 화면 회전을 설정한다. (13)~(14) 컨트롤을 통해 화면 확대/축소 방법을 조정한다. (15) 컨트롤을 체크하여 화면에 지명도시를 하고, (16) 컨트롤을 선택하여 화면 십자
표시를 한다. 코드는 아래와 같다.
C#
private void comboBoxGrid_SelectedIndexChanged(object sender, EventArgs e)
{
    int gridIndex = comboBoxGrid.SelectedIndex;
    if (gridIndex == 0) // none
    {
        nxMilmapView1.GridType = NXMilmapView.eGridType.GridNone;
        nxMilmapView1.ShowGrid = false;
    }
    else if (gridIndex == 1)    // Degrees
    {
        nxMilmapView1.GridType = NXMilmapView.eGridType.GridDegrees;
        nxMilmapView1.ShowGrid = true;
    }
    else if (gridIndex == 2)    // GARS
    {
        nxMilmapView1.GridType = NXMilmapView.eGridType.GridGARS;
        nxMilmapView1.ShowGrid = true;
    }
    // 화면 갱신 요청
    nxMilmapView1.RefreshScreen();
}

// 화면이 회전되지 않도록 설정
private void radioButtonRotateNone_CheckedChanged(object sender, EventArgs e)
{
    NXMilmapDrawArgs drawArgs = nxMilmapView1.GetDrawArgs();
    drawArgs.Rotatable = false;
}

// 화면 회전이 가능하도록 설정
private void radioButtonRotateMouse_CheckedChanged(object sender, EventArgs e)
{
    NXMilmapDrawArgs drawArgs = nxMilmapView1.GetDrawArgs();
    drawArgs.Rotatable = true;
}

// 화면 회전이 가능하도록 설정하고 사용자 입력하는 각도에 따라 화면 회전
private void textBoxRotateUserInput_TextChanged(object sender, EventArgs e)
{
    // 사용자 입력을 선택하지 않은 경우 반영하지 않는다.
    if (!radioButtonRotateUserInput.Checked) return;

    NXMilmapDrawArgs drawArgs = nxMilmapView1.GetDrawArgs();
    double angleRotate = Double.Parse(textBoxRotateUserInput.Text);
    // 화면 회전 각도 설정
    drawArgs.AzimuthAng = XAngle.FromDegree(angleRotate);
    drawArgs.Rotatable = true;
    nxMilmapView1.RefreshScreen();
}

// 화면 확대/축소의 중심을 화면중심으로 설정
private void radioButtonZoomViewCenter_CheckedChanged(object sender, EventArgs e)
{
    nxMilmapView1.ZoomType = NXMilmapView.eZoomType.ViewCenter;
}

// 화면 확대/축소 중심을 마우스 위치 중심으로 설정
private void radioButtonZoomMousePosition_CheckedChanged(object sender, EventArgs e)
{
    nxMilmapView1.ZoomType = NXMilmapView.eZoomType.MousePostion;
}

// 지명 도시 여부를 설정
private void checkBoxShowPBP_CheckedChanged(object sender, EventArgs e)
{
    nxMilmapView1.ShowPlaceName = checkBoxShowPBP.Checked;
    nxMilmapView1.RefreshScreen();
}

// 화면 중심에 십자 표시 여부 설정
private void checkBoxShowCross_CheckedChanged(object sender, EventArgs e)
{
    nxMilmapView1.ShowCross(checkBoxShowCross.Checked);
    nxMilmapView1.RefreshScreen();
}
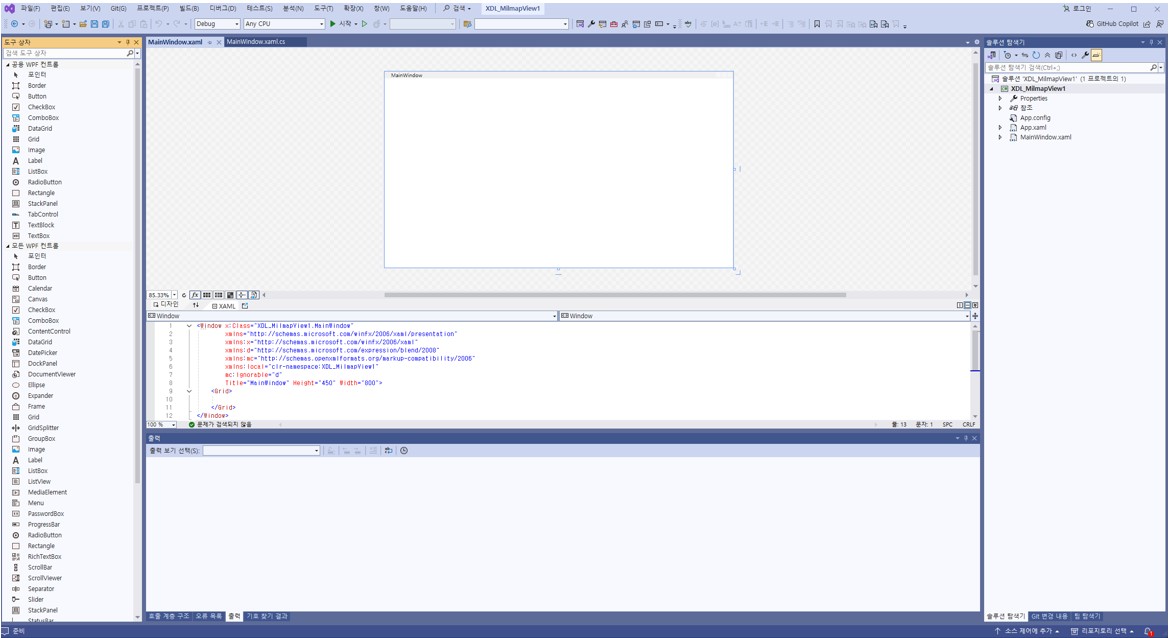
“다음” 버튼을 눌러 사용자가 원하는 경로를 선택한 다음 프로젝트 이름을 “XDL_MilmapView1” 으로 입력하고 [새 프로젝트] 대화상자의 “만들기” 버튼을 클릭한다. “만들기” 버튼을 누르면 프로젝트가 기본적으로 생성되고, 화면에 Window을 디자인할 수 있는 화면이 뜬다. 만약 아래와
같은 Window 창이 생성되지 않으면, [솔루션 탐색기] 창에서 “MainWindow.xaml”를 마우스 더블클릭을 하여 창을 연다.
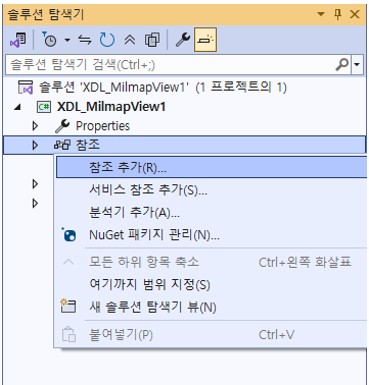
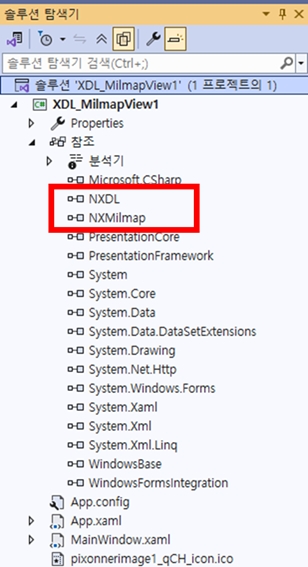
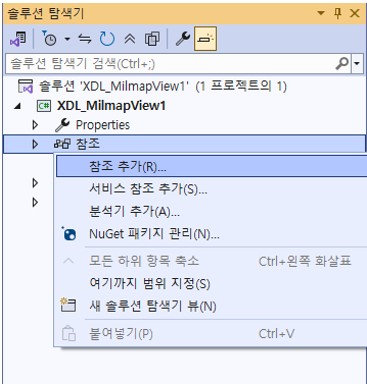
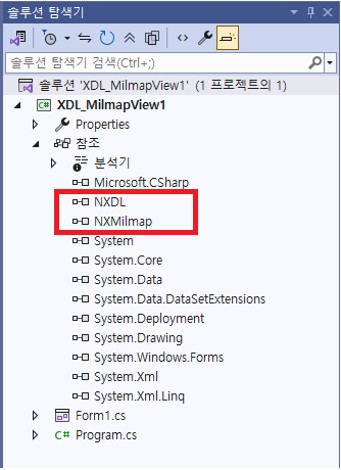
1.4 솔루션 탐색기의 프로젝트 하부의 [참조]의 오른쪽 마우스 클릭을 통해 [참조추가]를 선택한다.
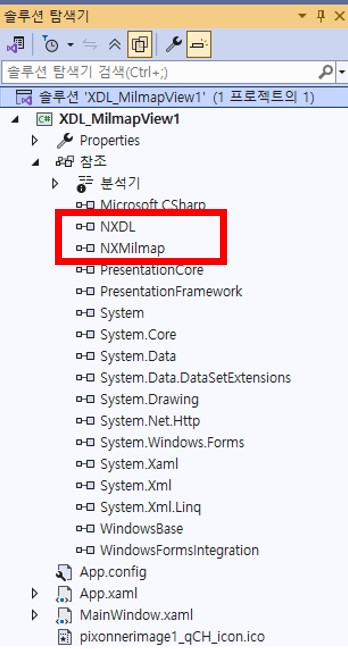
1.5 [찾아보기]탭으로 이동한 후 “C:\Pixoneer\XDL3.0\bin\”경로로 이동한다. Ctrl키를 누른 채 연속으로 “NXDL.dll”, “NXMilmap.dll”을 선택한 후 “확인”버튼을 선택한다.
1.6 솔루션 탐색기의 프로젝트 하부의 [참조]항에 NXDL, NXMilmap이 추가되었음을 확인한다.
1.7 NXMilmap컨트롤을 활용하기 위해 MainWindow.xaml 창에서 namespace를 다음과 같이 추가한다.
2프로그램 디자인
Number
Name
Control type
Content
Items
(1)
checkBoxInverseMouseButton
CheckBox
InverseMouseButton
(2)
checkBoxInverseMouseWheel
CheckBox
InverseMouseWheel
(3)
checkBoxScale
CheckBox
Scale
(4)
comboBoxScale
ComboBox
(5)
textBoxCenterLon
TextBox
(6)
textBoxCenterLat
TextBox
(7)
buttonCenterMove
Button
이동
(8)
comboBoxGrid
comboBox
None, Degrees, GARS
(9)
radioButtonRotateNone
RadioButton
None
(10)
radioButtonRotateMouse
RadioButton
Mouse 사용
(11)
radioButtonRotateUserInput
RadioButton
사용자 입력
(12)
textBoxRotateUserInput
TextBox
(13)
radioButtonZoomViewCenter
RadioButton
화면 중심 확대/축소
(14)
radioButtonZoomMousePosition
RadioButton
마우스 위치 중심 확대/축소
(15)
checkBoxShowPBP
CheckBox
Show PBP
(16)
checkBoxCross
CheckBox
Show Cross
(17)
nxMilmapView1
NXMilmapView
(18)
GridSplitter1
GridSplitter
2.1 MainWindow.xaml 창에서 기본으로 생성된 Grid 레이아웃에 Grid.ColumnDefinition을 이용하여 세 개의 Column을 생성한다. 첫 번째 Column에는 위의 표를 이용하여 디자인한다. 두 번째 Column은 GridSpiltter을 배치하고 세 번째 Column은 NXMilmapView 컨트롤을 배치한다.
먼저 Grid를 세 개의 Column으로 나눈다. 그 다음으로 첫 번째 Column에 위의 표를 참고하여 도구상자를 이용하여 컨트롤을 배치한다. 자세한 코드는 샘플코드를 참고한다.
2.3 Grid 레이아웃 내부에서 세 번째 Cell에 Grid를 배치하고 도구상자에서 WindowFormHost 컨트롤을 끌어다 배치한다. 이 컨트롤은 Window forms를 Hosting 해주는 개체이며 Window Forms Control을 사용할 때 이용된다. (WindowFormIntegration와 System.Window.Forms 을 어셈블리에 대한
참조 추가를 한다.)
2.4 앞서 추가한 namespace nxMilmap를 이용하여 NXMilmapView컨트롤을 불러온다. 이 NXMilmapView의 이름은 nxMilmapView1으로 한다.
NXMilmapView는 Equal-arc 좌표 시스템에서 CADRG(Compressed ARC digitized Raster Grshpics), CIB(Controlled Image Base)와 같은 군 지역 지도 데이터를 정의하는 클래스와 제어함수를 포함한다.
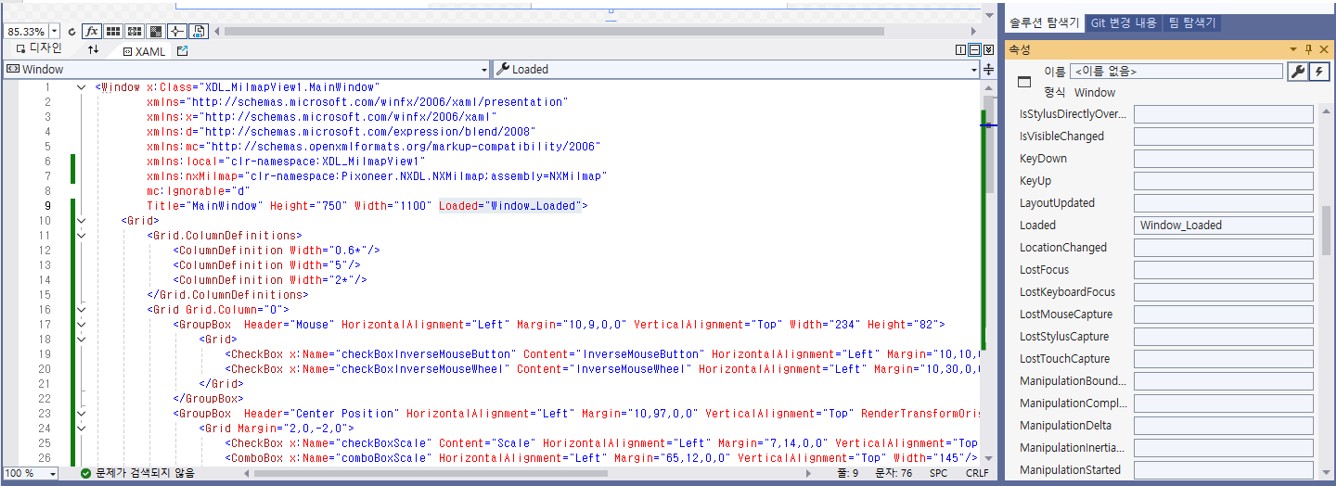
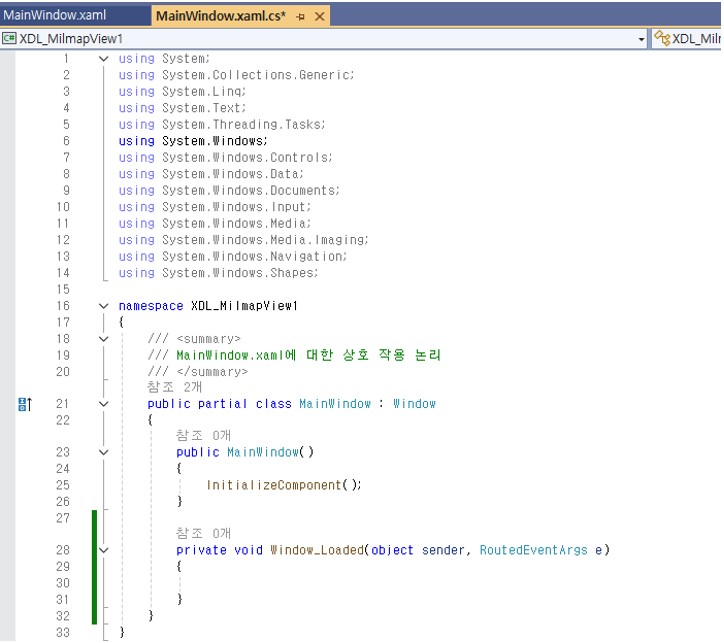
3.1 Window를 선택하고 [속성] 창 - [이벤트] 메뉴를 선택한 뒤 “Loaded” 이벤트를 더블 클릭한다.
“Loaded” 이벤트를 더블 클릭하면, “Window_Loaded” 함수가 자동적으로 추가되고 아래와 같이 추가적인 기능을 구현할 수 있도록 MainWindow.xaml.cs의 코드로 이동하는 것을 확인할 수 있다.
Window_Loaded 함수와 함께 아래와 같이 코드를 추가한다.
C#
private void Window_Loaded(object sender, RoutedEventArgs e)
{
    // XMilmapConfig.xml을 이용하여 군사지도를 위한 NXMilmapView 및 NXMilmapEngine을 초기화한다.
    if (!NXMilmapView.m_MapEngine.InitFromXML("c:\\Pixoneer\\XDL3.0\\Config\\XMilmapConfig.xml"))
    {
        return;
    }

    // 마우스 휠을 끌고 당기는 것을 확대/축소 요인으로 계산하여 화면을 확대/축소한다.
    // 이 때, 계산된 공간 해상도와 가까운 축척(scale)이 있는 경우 자동적으로 해당 축척으로 바뀌면서 도시된다.
    // 마우스 휠을 끌고 당기는 것으로 화면의 축척을 변경하려면, NXMilmapView.eWheelZoomAction.ByScaleIndex으로 설정
    nxMilmapView1.WheelZoomAction = NXMilmapView.eWheelZoomAction.ByZoomFactor;

    nxMilmapView1.SetGeoToCenter(0, new XVertex2d(127.0, 36.0));

    // XMilmapConfig.xml에 설정된 지도 중 유효한 데이터만을 사용한다.
    // XMilmapConfig.xml에서 로딩한 스케일의 이름을 Scale을 위한 ComboBox에 추가한다.
    int numScale = NXMilmapView.m_MapEngine.GetNumOfScale();
    for (int i = 0; i < numScale; i++)
    {
        string scaleName = NXMilmapView.m_MapEngine.GetScaleName(i);
        comboBoxScale.Items.Add(scaleName);
    }
    // 첫 번째 스케일을 기본값으로 하여 도시한다.
    if (numScale > 0)
        comboBoxScale.SelectedIndex = 0;

    // Mouse 이벤트 속성
    checkBoxInverseMouseButton.IsChecked = nxMilmapView1.InverseMouseButton;
    checkBoxInverseMouseWheel.IsChecked = nxMilmapView1.InverseMouseWheel;

    // Grid
    if (nxMilmapView1.GridType == NXMilmapView.eGridType.GridNone)
        comboBoxGrid.SelectedIndex = 0;
    else if (nxMilmapView1.GridType == NXMilmapView.eGridType.GridDegrees)
        comboBoxGrid.SelectedIndex = 1;
    else if (nxMilmapView1.GridType == NXMilmapView.eGridType.GridGARS)
        comboBoxGrid.SelectedIndex = 2;
    else
        comboBoxGrid.SelectedIndex = 0;

    // MilmapView 회전 설정
    NXMilmapDrawArgs drawArgs = nxMilmapView1.GetDrawArgs();
    if (drawArgs.Rotatable)
    {
        radioButtonRotateNone.IsChecked = false;
        radioButtonRotateMouse.IsChecked = true;
        radioButtonRotateUserInput.IsChecked = false;
    }
    else
    {
        radioButtonRotateNone.IsChecked = true;
        radioButtonRotateMouse.IsChecked = false;
        radioButtonRotateUserInput.IsChecked = false;
    }

    if (nxMilmapView1.ZoomType == NXMilmapView.eZoomType.MousePostion)
    {
        radioButtonZoomMousePosition.IsChecked = true;
        radioButtonZoomViewCenter.IsChecked = false;
    }
    // NXMilmapView.eZoomType.ViewCenter이 경우
    else
    {
        radioButtonZoomMousePosition.IsChecked = false;
        radioButtonZoomViewCenter.IsChecked = true;
    }

    // 지명 도시 여부 설정
    checkBoxShowPBP.IsChecked = nxMilmapView1.ShowPlaceName;
    // NXMilmapView는 기본적으로 화면 중앙에 붉은 십자를 표시힌다.
    checkBoxShowCross.IsChecked = true;
}
3.2 Window를 선택하고 [속성] 창 - [이벤트] 메뉴를 선택한 뒤 “Closed” 이벤트를 더블 클릭한다.
3.3 Mouse 이벤트 관련한 (1)~(2) 컨트롤을 Window창에서 선택한 후 더블 클릭한다.
컨트롤에서 마우스로 더블 클릭하면 대표적인 이벤트에 대해 자동적으로 함수가 추가된다.
아래와 같은 코드를 추가한다.
C#
private void checkBoxInverseMouseButton_Checked(object sender, RoutedEventArgs e)
{
    // MilmapView는 기본적으로 마우스 왼쪽 버튼으로 화면 이동을, 오른쪽 버튼으로 화면 회전을 한다.
    // 마우스 왼쪽 버튼과 오른쪽 버튼에 대한 기능을 전환하려면, NXMilmapView의 InverseMouseButton을 true로 설정하면 된다.
    nxMilmapView1.InverseMouseButton = true;
}

private void checkBoxInverseMouseButton_Unchecked(object sender, RoutedEventArgs e)
{
    // MilmapView는 기본적으로 마우스 왼쪽 버튼으로 화면 이동을, 오른쪽 버튼으로 화면 회전을 한다.
    // 마우스 왼쪽 버튼과 오른쪽 버튼에 대한 기능을 전환 후 해제하려면, NXMilmapView의 InverseMouseButton을 false로 설정하면 된다.
    nxMilmapView1.InverseMouseButton = false;
}

private void checkBoxInverseMouseWheel_Checked(object sender, RoutedEventArgs e)
{
    // MilmapView의 WheelZoomAction 값이 NXMilmapView.eWheelZoomAction.ByZoomFactor인 경우
    // MilmapView는 기본적으로 마우스 휠을 당기면 화면확대가, 밀면 화면축소가 된다.
    // 이를 전환하려면 MilmapView의 InverseMouseWheel을 true로 설정하면 된다.
    nxMilmapView1.InverseMouseWheel = true;
}

private void checkBoxInverseMouseWheel_Unchecked(object sender, RoutedEventArgs e)
{
    // MilmapView의 WheelZoomAction 값이 NXMilmapView.eWheelZoomAction.ByZoomFactor인 경우
    // MilmapView는 기본적으로 마우스 휠을 당기면 화면확대가, 밀면 화면축소가 된다.
    // 이를 전환 후 해제하려면 MilmapView의 InverseMouseWheel을 false로 설정하면 된다.
    nxMilmapView1.InverseMouseWheel = false;
}
3.4 축척을 변경하고 특정 위경도 위치로 화면 중심을 변경하는 것을 구현하기 위해 (4), (7) 컨트롤을 Window 창에서 선택한 후 더블 클릭한다.
(3) 컨트롤인 checkBoxScale을 선택하고 (4) 컨트롤인 comboBoxScale을 변경하여 선택된 축척으로 화면을 도시하고, (5)~(6)의 TextBox 컨트롤에 위경도를 입력한 뒤 (7) 컨트롤인 buttonCenterMove를 클릭하면 해당 위치로 화면의 중심을 이동하려 한다. 이 때, 입력 위치에 해당 축척이
있는 경우에만 이동 가능하다. 코드는 아래와 같다.
C#
private void comboBoxScale_SelectionChanged(object sender, SelectionChangedEventArgs e)
{
    // 축척(scale)을 선택하지 않은 경우에는 축척 변경을 하지 않는다.
    Nullable<bool> result = checkBoxScale.IsChecked;
    if (result != true) return;

    int numScale = NXMilmapView.m_MapEngine.GetNumOfScale();
    int idx = comboBoxScale.SelectedIndex;

    // 축척 인덱스의 유효함 체크
    if (idx < 0 || idx >= numScale) return;

    NXMilmapDrawArgs drawArgs = nxMilmapView1.GetDrawArgs();

    // 현재 화면 중심으로 해서 변경된 축척 인덱스로 변경
    nxMilmapView1.SetGeoToCenter(idx, drawArgs.CenterPos);

    // 화면 갱신 요청
    nxMilmapView1.RefreshScreen();
}

private void buttonCenterMove_Click(object sender, RoutedEventArgs e)
{
    double posLon = Double.Parse(textBoxCenterLon.Text);
    double posLat = Double.Parse(textBoxCenterLat.Text);

    // 입력 화면 중심 위경도 좌표 유효 체크
    if (posLon < -180.0 || posLon > 180.0) return;
    if (posLat < -90.0 || posLat > 90.0) return;

    NXMilmapDrawArgs drawArgs = nxMilmapView1.GetDrawArgs();
    // 현재 설정된 축척을 기반으로 화면 중심을 이동한다.
    nxMilmapView1.SetGeoToCenter(drawArgs.ScaleIndex, new XVertex2d(posLon, posLat));

    // 화면 갱신 요청
    nxMilmapView1.RefreshScreen();
}
3.5 (8)~(16) 컨트롤을 Window 창에서 선택한 후 더블 클릭한다.
(8) 컨트롤인 comboBoxGrid를 이용하여 Grid의 도시 여부 설정 및 종류를 설정하고, (9)~(12) 컨트롤을 이용하여 화면 회전을 설정한다. (13)~(14) 컨트롤을 통해 화면 확대/축소 방법을 조정한다. (15) 컨트롤을 체크하여 화면에 지명도시를 하고, (16) 컨트롤을 선택하여 화면 십자
표시를 한다. 코드는 아래와 같다.
C#
private void comboBoxGrid_SelectionChanged(object sender, SelectionChangedEventArgs e)
{
    int gridIndex = comboBoxGrid.SelectedIndex;
    if (gridIndex == 0) // none
    {
        nxMilmapView1.GridType = NXMilmapView.eGridType.GridNone;
        nxMilmapView1.ShowGrid = false;
    }

    else if (gridIndex == 1)    // Degrees
    {
        nxMilmapView1.GridType = NXMilmapView.eGridType.GridDegrees;
        nxMilmapView1.ShowGrid = true;
    }

    else if (gridIndex == 2)    // GARS
    {
        nxMilmapView1.GridType = NXMilmapView.eGridType.GridGARS;
        nxMilmapView1.ShowGrid = true;
    }

    // 화면 갱신 요청
    nxMilmapView1.RefreshScreen();
}

// 화면이 회전되지 않도록 설정
private void radioButtonRotateNone_Checked(object sender, RoutedEventArgs e)
{
    NXMilmapDrawArgs drawArgs = nxMilmapView1.GetDrawArgs();
    drawArgs.Rotatable = false;
}

// 화면 회전이 가능하도록 설정
private void radioButtonRotateMouse_Checked(object sender, RoutedEventArgs e)
{
    NXMilmapDrawArgs drawArgs = nxMilmapView1.GetDrawArgs();
    drawArgs.Rotatable = true;
}

// 화면 회전이 가능하도록 설정하고 사용자 입력하는 각도에 따라 화면 회전
private void textBoxRotateUserInput_TextChanged(object sender, TextChangedEventArgs e)
{
    // 사용자 입력을 선택하지 않은 경우 반영하지 않는다.
    Nullable<bool> result = radioButtonRotateUserInput.IsChecked;
    if (result != true) return;

    NXMilmapDrawArgs drawArgs = nxMilmapView1.GetDrawArgs();
    double angleRotate = Double.Parse(textBoxRotateUserInput.Text);

    // 화면 회전 각도 설정
    drawArgs.AzimuthAng = XAngle.FromDegree(angleRotate);
    drawArgs.Rotatable = true;
    nxMilmapView1.RefreshScreen();
}

// 화면 확대/축소의 중심을 화면 중심으로 설정
private void radioButtonZoomViewCenter_Checked(object sender, RoutedEventArgs e)
{
    nxMilmapView1.ZoomType = NXMilmapView.eZoomType.ViewCenter;
}

// 화면 확대/축소 중심을 마우스 위치 중심으로 설정
private void radioButtonZoomMousePosition_Checked(object sender, RoutedEventArgs e)
{
    nxMilmapView1.ZoomType = NXMilmapView.eZoomType.MousePostion;
}

// 지명 도시 여부를 설정
private void checkBoxShowPBP_Checked(object sender, RoutedEventArgs e)
{
    nxMilmapView1.ShowPlaceName = true;
    nxMilmapView1.RefreshScreen();
}

private void checkBoxShowPBP_Unchecked(object sender, RoutedEventArgs e)
{
    nxMilmapView1.ShowPlaceName = false;
    nxMilmapView1.RefreshScreen();
}

// 화면 중심에 십자 표시 여부 설정
private void checkBoxShowCross_Checked(object sender, RoutedEventArgs e)
{
    bool result = (bool)checkBoxShowCross.IsChecked;
    nxMilmapView1.ShowCross(result);
    nxMilmapView1.RefreshScreen();
}

private void checkBoxShowCross_Unchecked(object sender, RoutedEventArgs e)
{
    bool result = (bool)checkBoxShowCross.IsChecked;
    nxMilmapView1.ShowCross(result);
    nxMilmapView1.RefreshScreen();
}

 프로젝트 속성 설정 : XDL 시작하기 중

 ] 메뉴를 선택한 뒤 “Load” 이벤트를 더블 클릭한다.